BLENDER HEAD FOREVER!
Blender Buddy!!
Go Back | NEXT!Distant Hills Tutorial.
I have been asked by several friends to do a tutorial,
on how I make my mountains in my backgrounds.
Its not real hard to do, so I figured that I would do
a quick written tutorial. I'm going to show you how I made
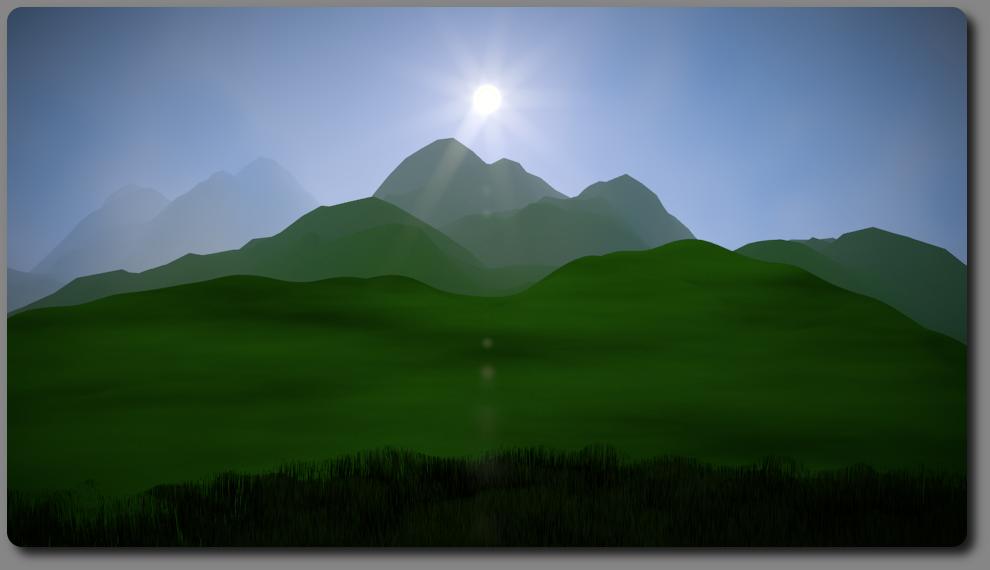
the Green mountain image.
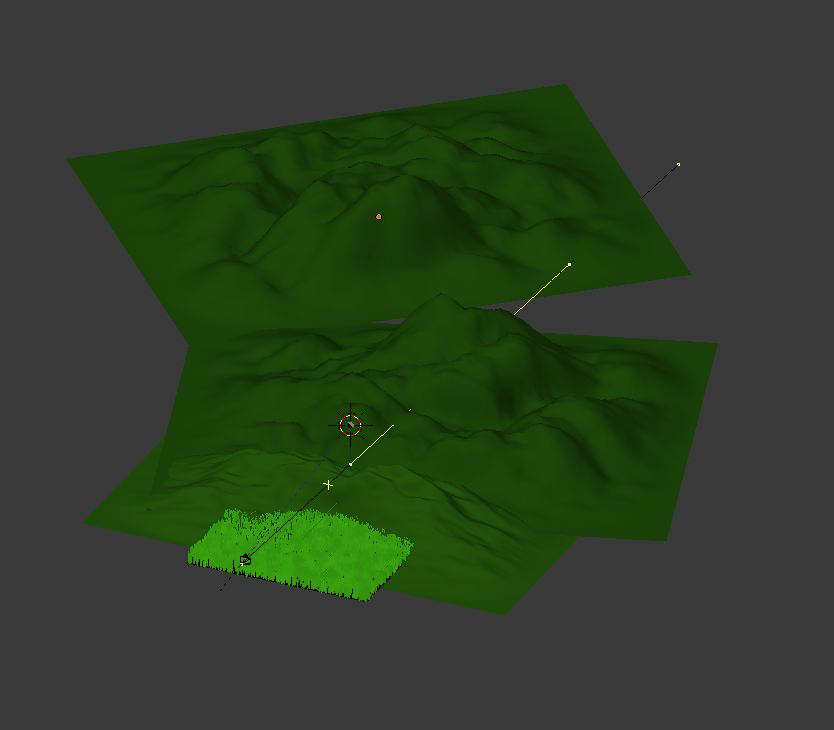
In this first image, you can see the set-up that I used to make Green Mountain image.
In the front you can see that I have created a plane on which I made some grass using Blender's particle system.
Its all up to you on how many different grasses and what color you want to use.
I'm assuming that you know how create a particle system but just in case you don't
I have added most of the settings that I used to create this image.
There are also three blender landscapes in the scene.
The sun is a small circle located right where the sun lamp is make sure you fill it in.
Make sure you place the sun on the second layer. The sun has to be on its own layer,
you will understand why when you start to do the compositing.
Also included in this first image is a Camera and a Sun Lamp.
The Sun Lamp is set to track to the Camera.
The first thing you do is select the Sun Lamp and then shift select the Camera,
once you have done this a menue will pop up and
from this menue you want to select track to camera.
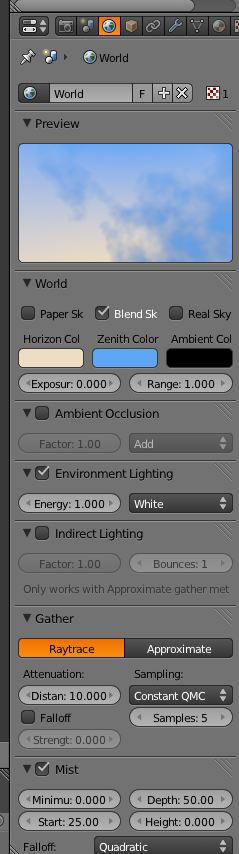
These are my world material settings.
Take a look at my mist settings,
its up to you on how much mist you would like to use.

These are my world texture settings.
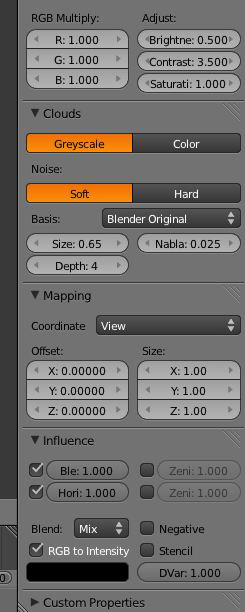
This image has the rest of my world texture settings.
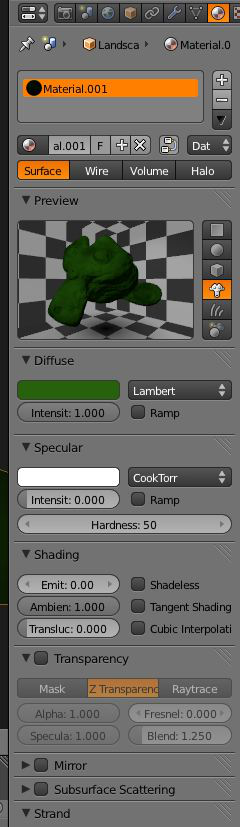
This image has the material settings for the three blender landscapes.
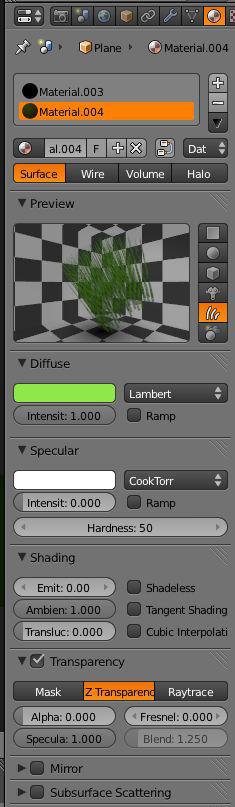
This next image has the material settings for the grass.
Take notice that the alpha setting is turned off.
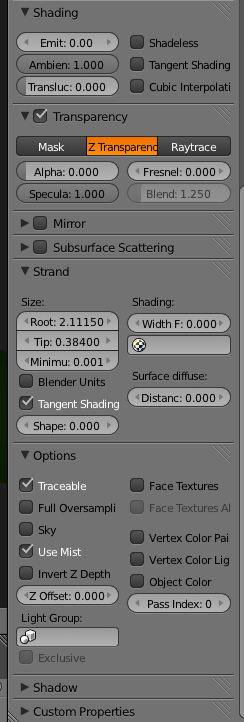
Here are some more of the grass settings.
There are several different ways to create grass,
its totally up to you on what type of grass you want.
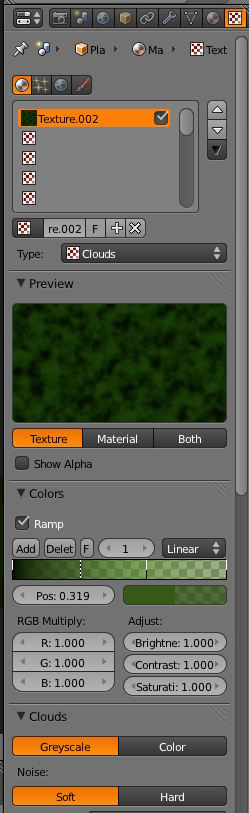
Here is the first half of the texture settings for my grass.
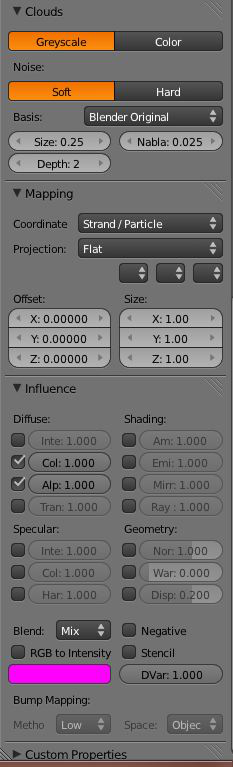
This is the second half of the texture settings.
Notice that the alpha button is turned back on.
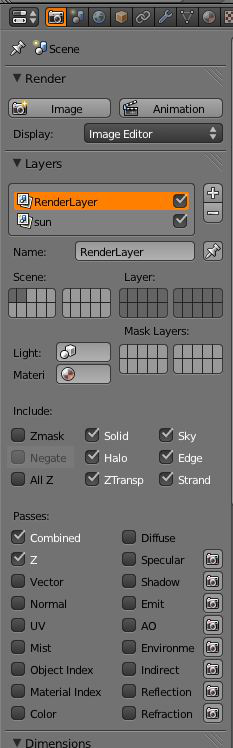
This image shows you that I created two layers, the first one is the render layer
and the second one is the sun layer.
This image shows you the settings for the render layer or the first layer.
Keep in mind that if you use the defocuse node you would have check the all z box.
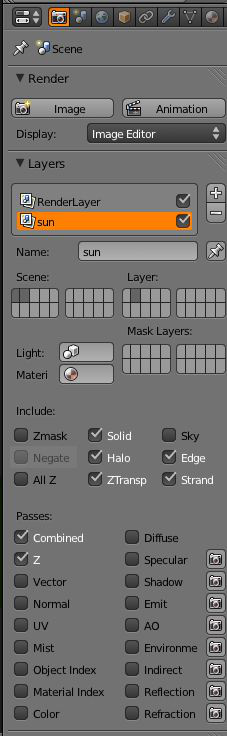
This image shows you the second layer settings
which in this case in the sun layer.
Take note that the sky option isn't selected in the sun layer.
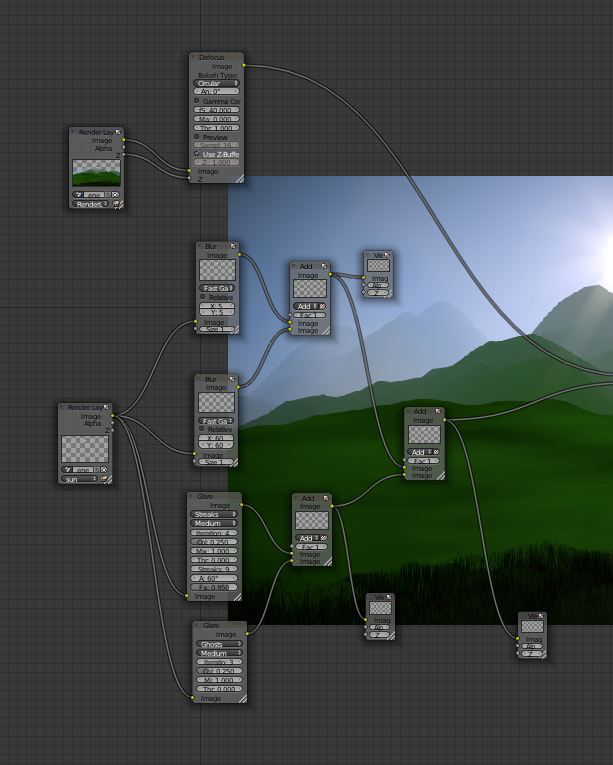
In this image we have the first half of my node set-up.
In order to use nodes you have to move from the default view to the compositor.
Once you have the compositor open you have to check the use nodes box and the back drop box.
In this first half of nodes we have to render layers.
The first one is the render layer and the second one is the sun layer.
The render layer is connected to a defocuse node and then to a mix node.
While the sun layer is connected to two blur nodes and two glare nodes.
And then they are all connected together with mix nodes.
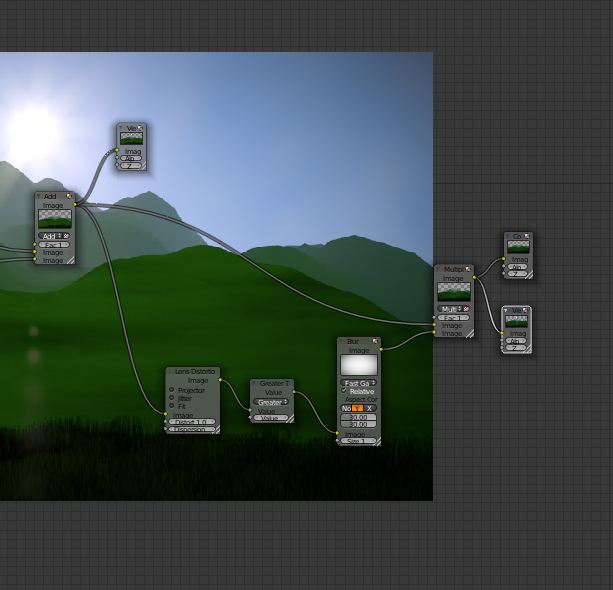
In this second image we have the second half of our node set-up.
All I really have here is a vignette and its really up to you wether or not
you want to use one. Be sure you use plenty of viewer output nodes.
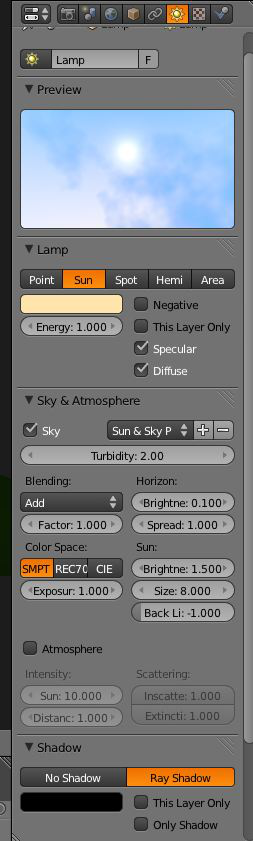
This image shows you our light settings, here I am using a sun lamp.

This image shows you our lighting set-up. Here I am using a sun lamp.
The sun lamp is set up to track to the camera.
To achieve this you have to select the lamp and then shift select the camera.
After you do this a menue will pop up you will want to select track to camera.
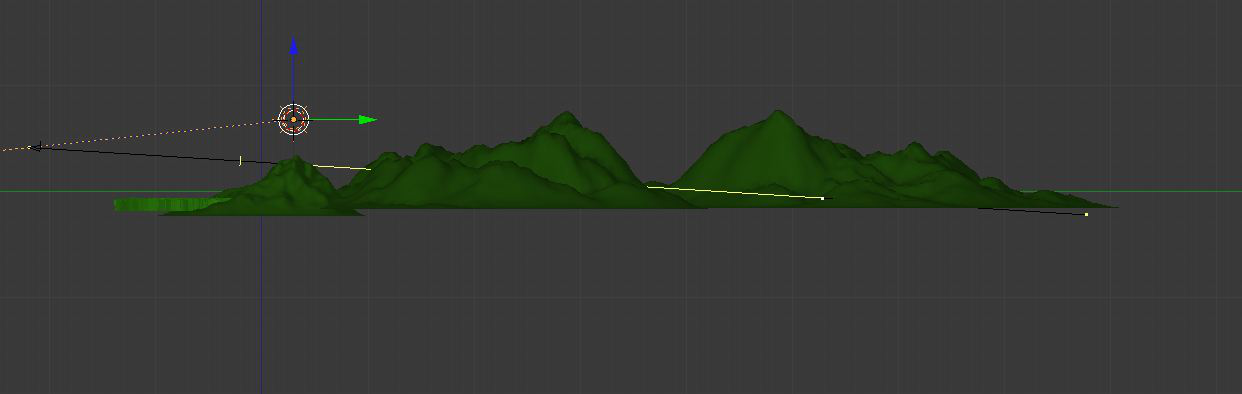
In this last image you can see a line coming out of the camera, it's called
the camera limits line the yellow portion is th mist area. There is also a small
yellow line that sits perpendicular to the camera this is your focuse line.
or in other words this is where your camera is focused.
Green mtn. hillside.
Green mtn. hillside.
If you would like to check out some more of my work.
Check out the PAGES in the Drop Down Menue below.
HOME PAGE

BACK TO TOP!

©Blender Buddy 2015